Create page
This is where the actual magic happens and where you cook your resume with our drag-and-drop, easy-to-use feature, along with multiple customizations.
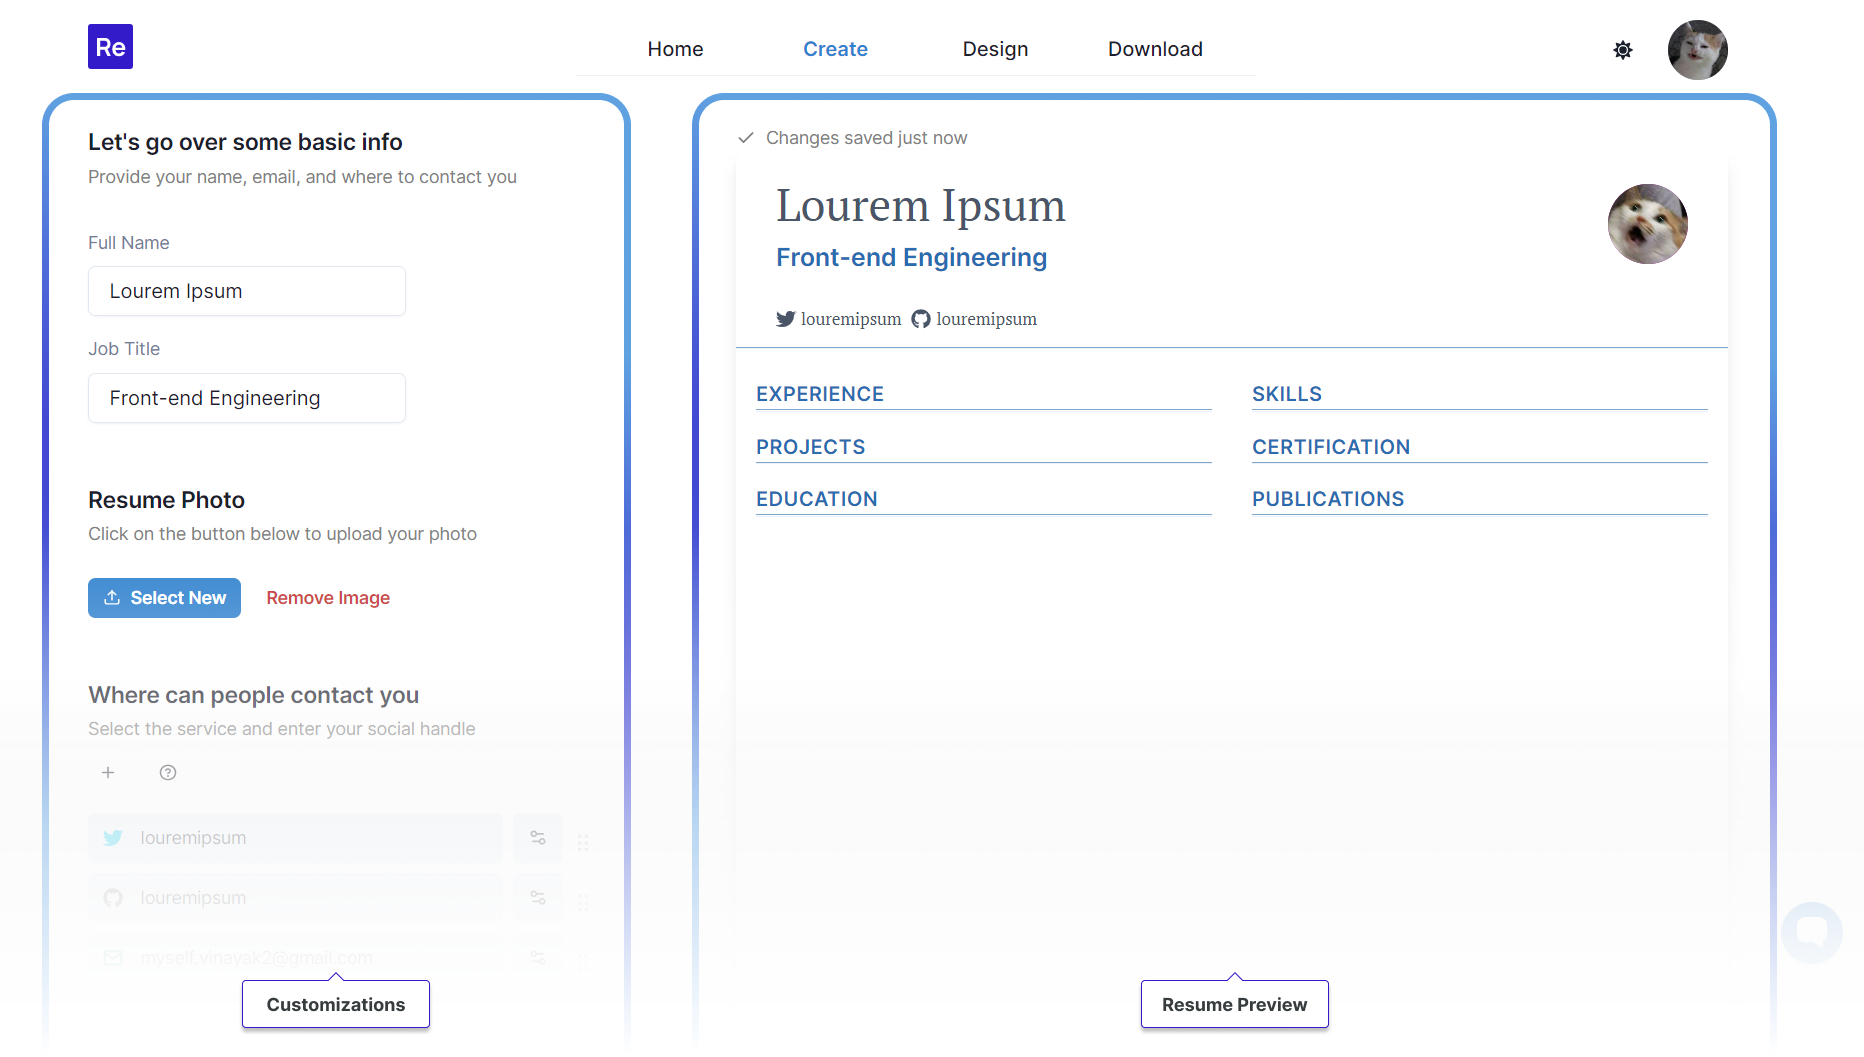
The create panel is the place where you get to edit the details inside your resume.
It gives you Editing options on the left and a Live resume preview on the right.
Customizations#
Basic Info#
Here you have to give your basic information like your Full Name and Job Title which will appear on the top of your resume.
You can also add a professional headshot(under Resume Photo) if you like and it will appear on the top right corner in circle.
info
Right now the resume photo only supports PNG/JPEG image formats with max size of 512KB.
Where can people contact you#
You can add various links identifier of your contacts from various website or phone number.

We provide the respective icon for the following websites :
- Github
- Gitlab
- Phone
- Portfolio
- Behance
- Dribbble
- Youtube
- Custom
note
The custom link option allows you to add links and identifiers which will appear on your resume. You can use these custom links to add your Leetcode, CodeChef profiles etc.
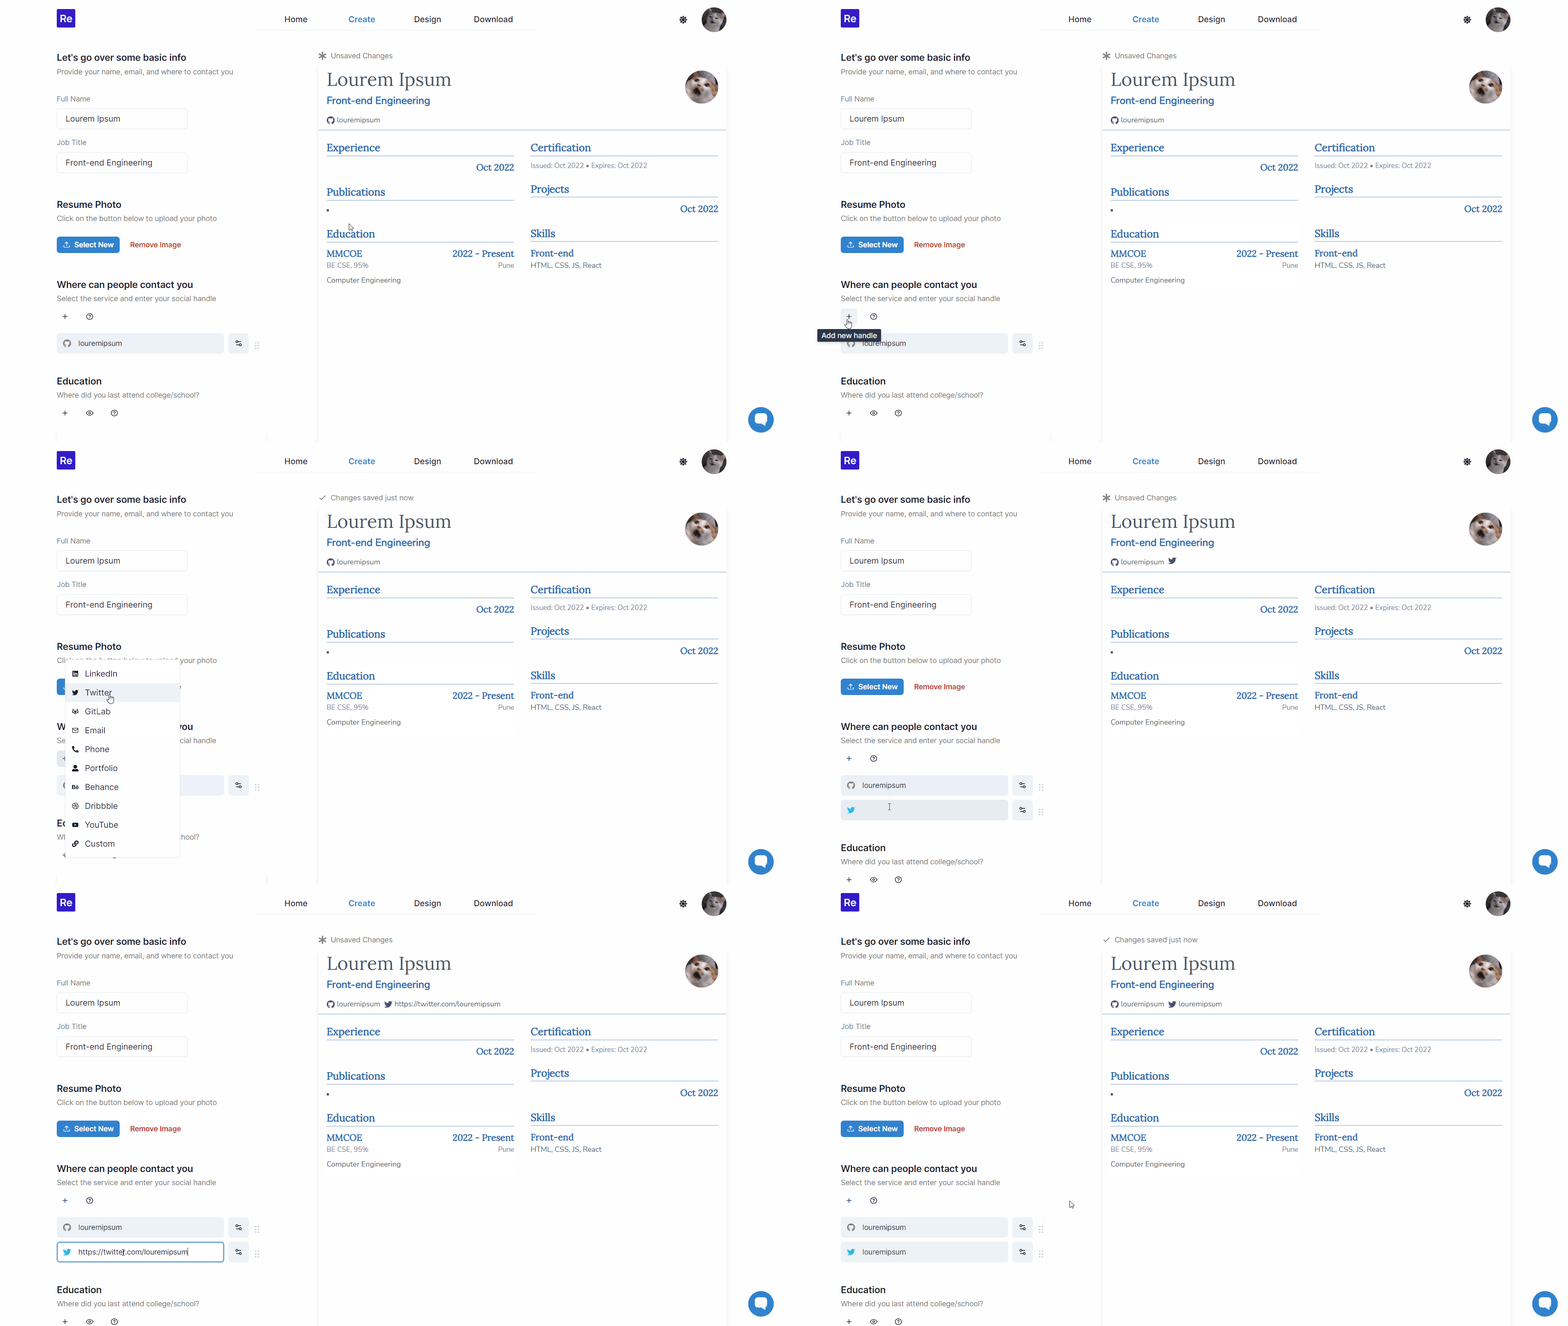
You only need to put the handle of the social site you're adding.
Working with a section#
The various sections are made with almost the same data input layout to familiarize the user with Resuminator and make it easy to use.
The description sub-section supports Rich-text editing and markdown.
tip
We support limited RTE and markdown functions like:
- Bold (
⌘/ctrl+B) - Italics (
⌘/ctrl+I) - Bulleted List(start a bulleted list with
*followed by letters) - Numbered List(start a Numbered list with
1.followed by letters) - Left align
- Justify
- Bold (
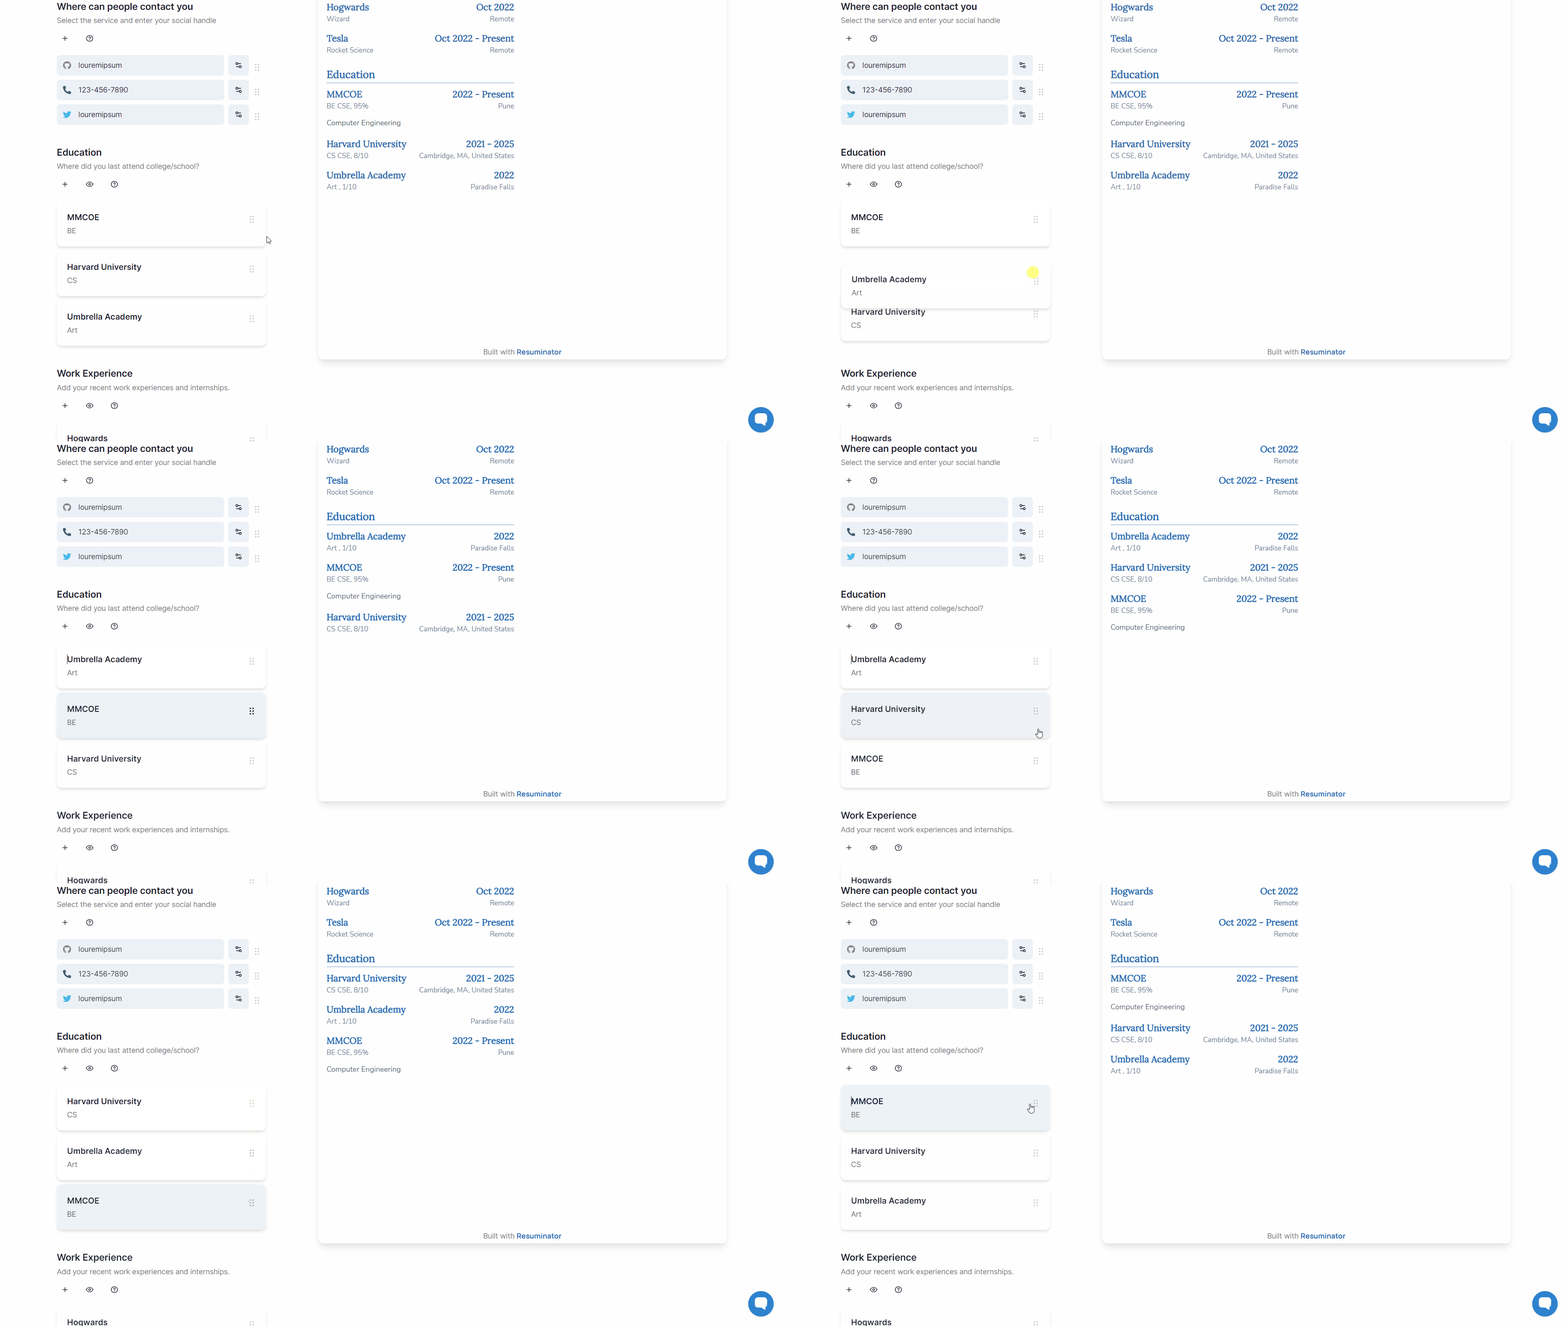
You can change the order of your sub-section of a section (when in collapsed state) by dragging it above or below of other sub-sections in that section.
For example, here drag and drop is shown in contacts and it is updated in resume to left and right of each other
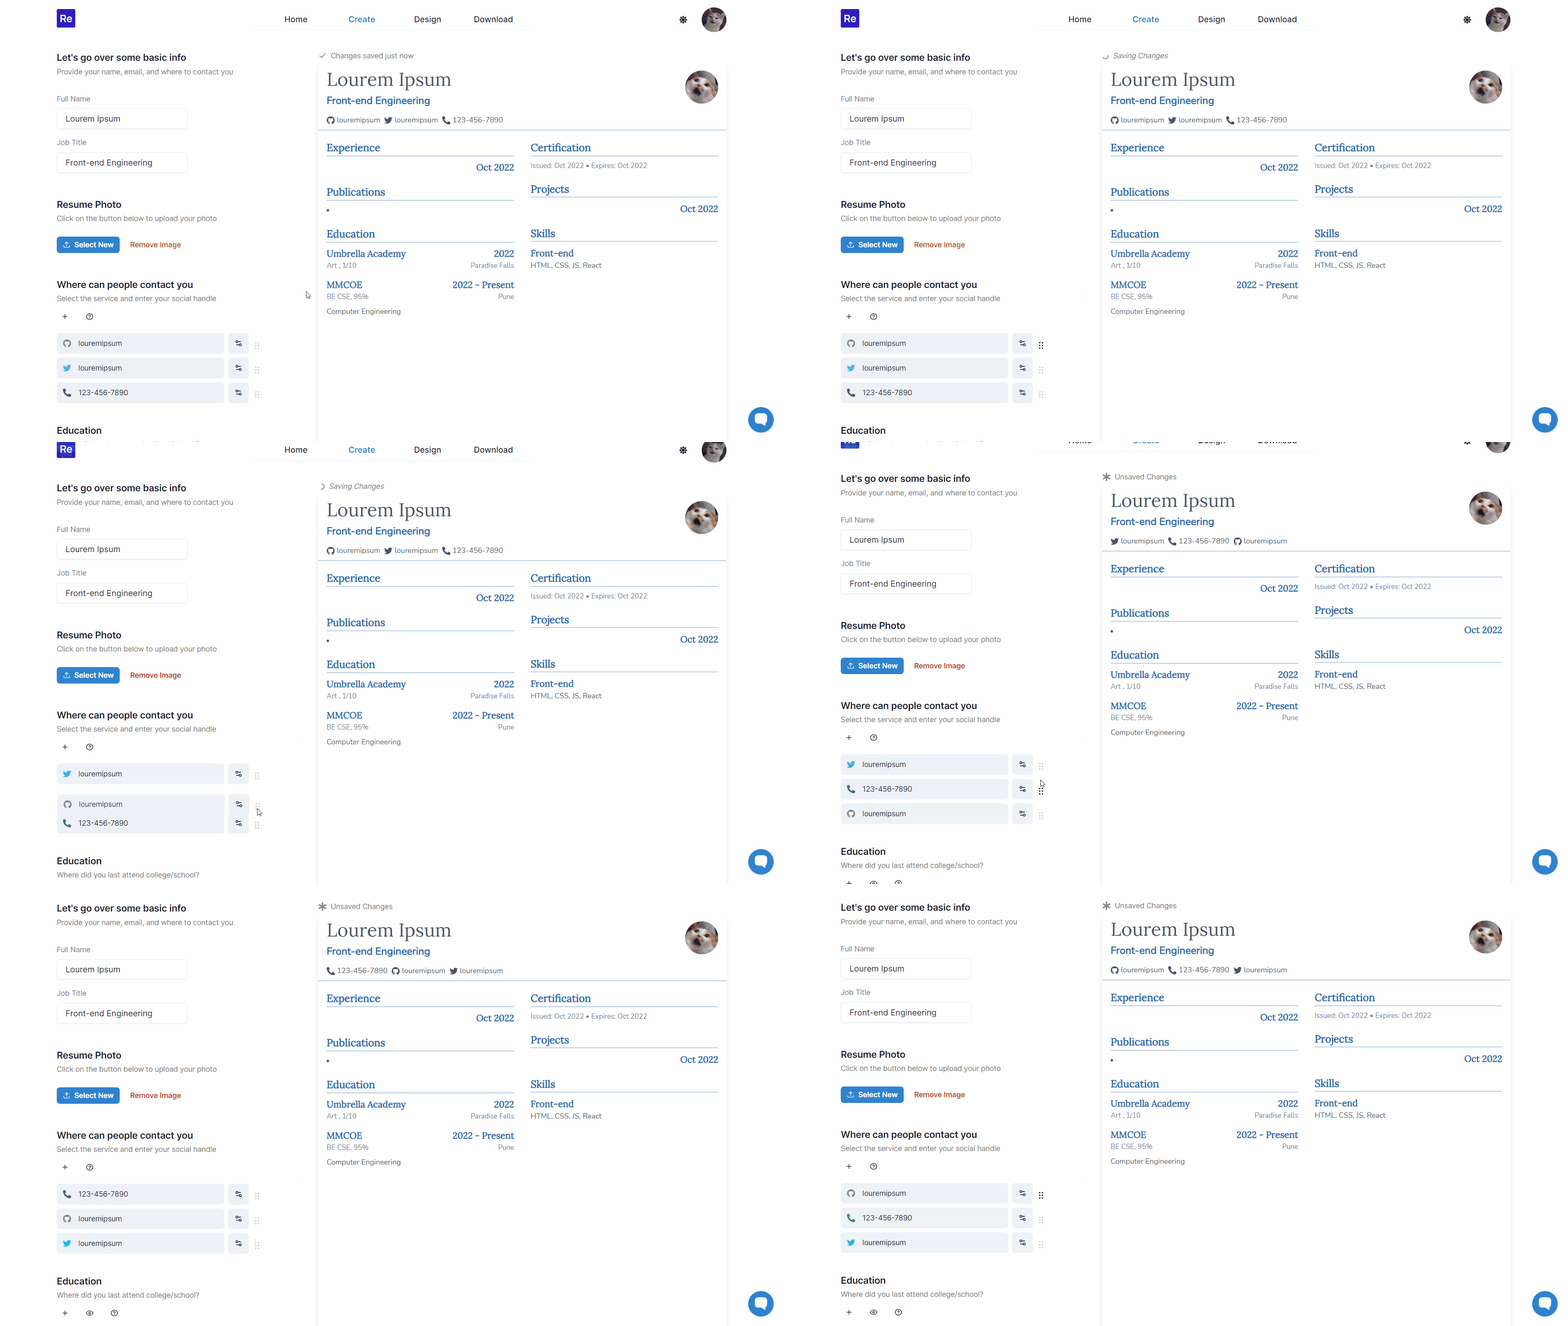
Here, in Education section(much like other sections beyond it) the order is reflected in the resume as shown in the resume input side.
Tags can be used to highlight skills/technologies relevant to the experience added.
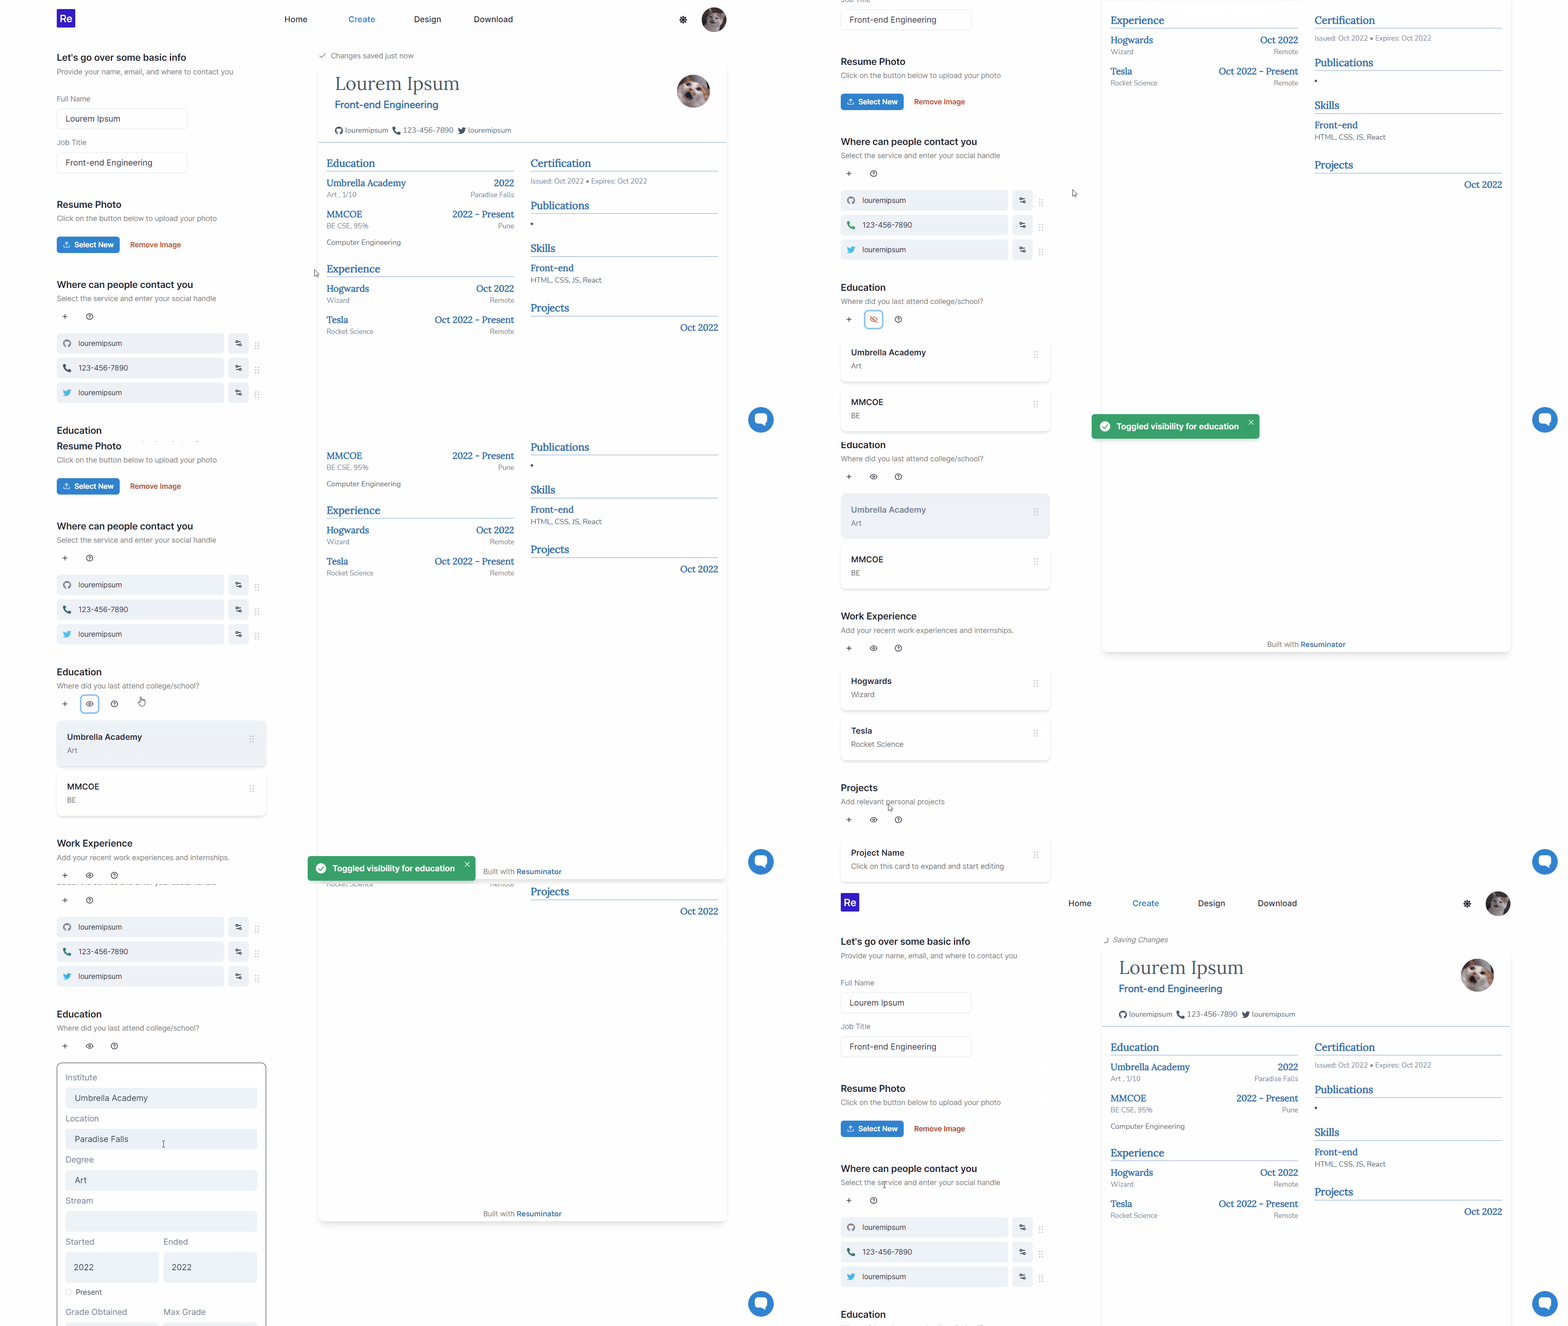
You can hide the entire section from your resume or a particular sub-section by toggling its respective visibility icon.
Education#
This section helps you add your recent degrees and education accomplishments.
Although this section is pretty self-explanatory when used in the product, here are some nuances to keep in mind -
- When entering your degree duration year, you can click on the present checkbox if it is still going, and it will display from the starting year to present
- If you have 100 in the max grade, then your marks will automatically convert to a percentage with its symbol.
- The description sub-section supports Rich-text editing and markdown.
- You can hide the entire Education section from your resume or a particular degree by toggling its visibility icon.
- You can change the order of your degrees (when in collapsed state) by dragging it.
tip
Most People Keep this section at the last of their resume. Freshers generally keep it on the top
Skills#
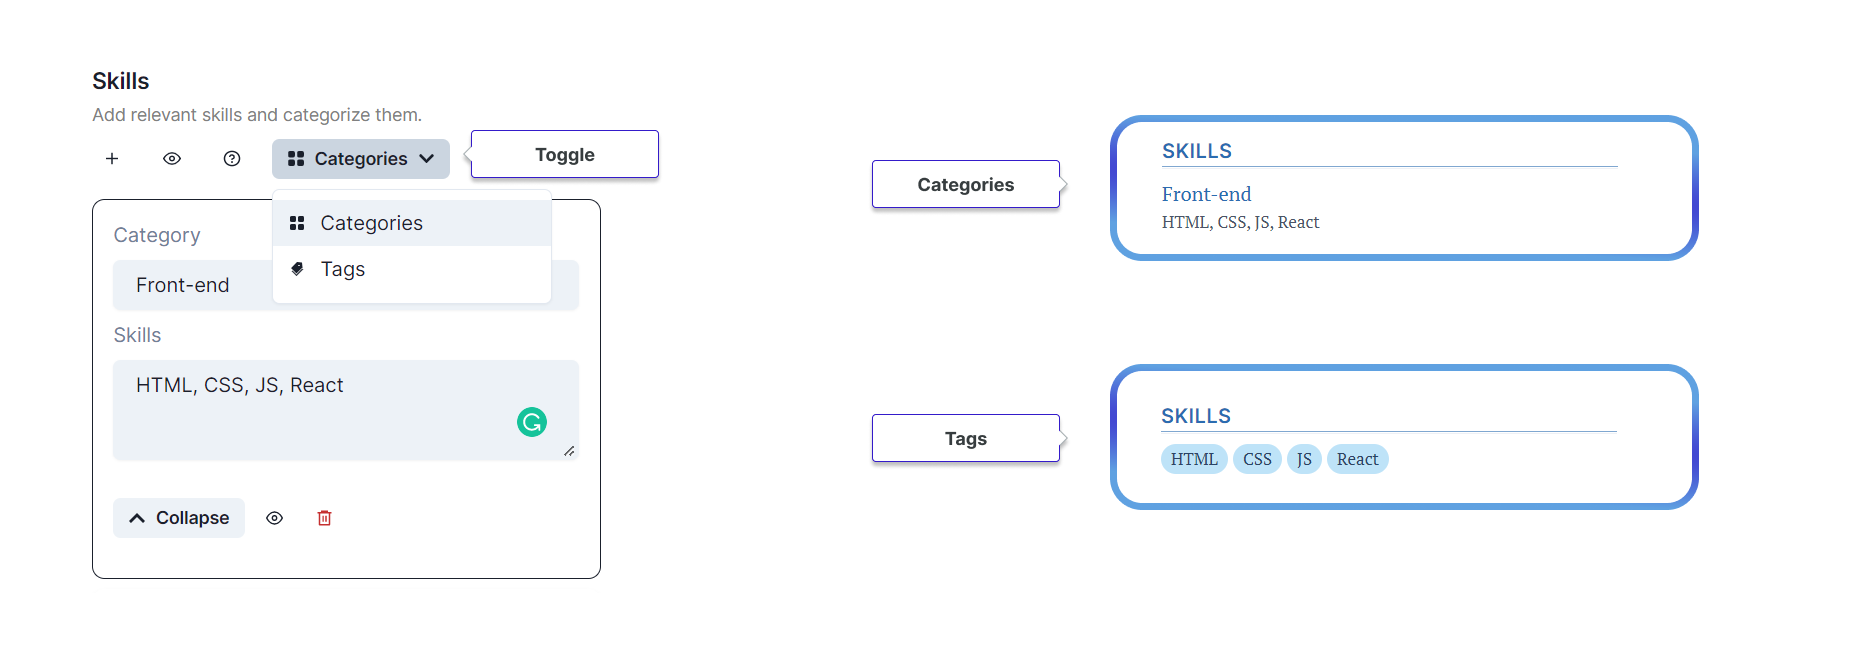
You can manually add your skills to your resume. Resuminator provides the display of skills in two ways:
- Categories
- Tags
Custom Sections#
This option allows you to add additional sections to your resume, that highlight any miscellaneous achievements, references, extra curricular activities or any social/volunteering associations.
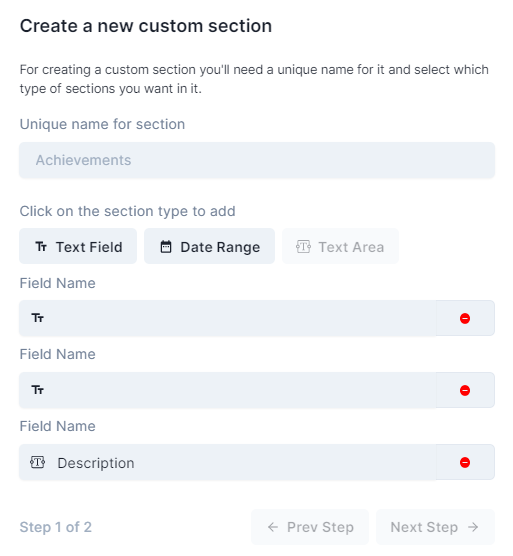
You can click on the Create new section button which would give you a popup to add the details about the section you intend to add.
Additionally you can also add the time period, and a short or a long description about this new section through three subsections provided in the popup.
Resume Preview#
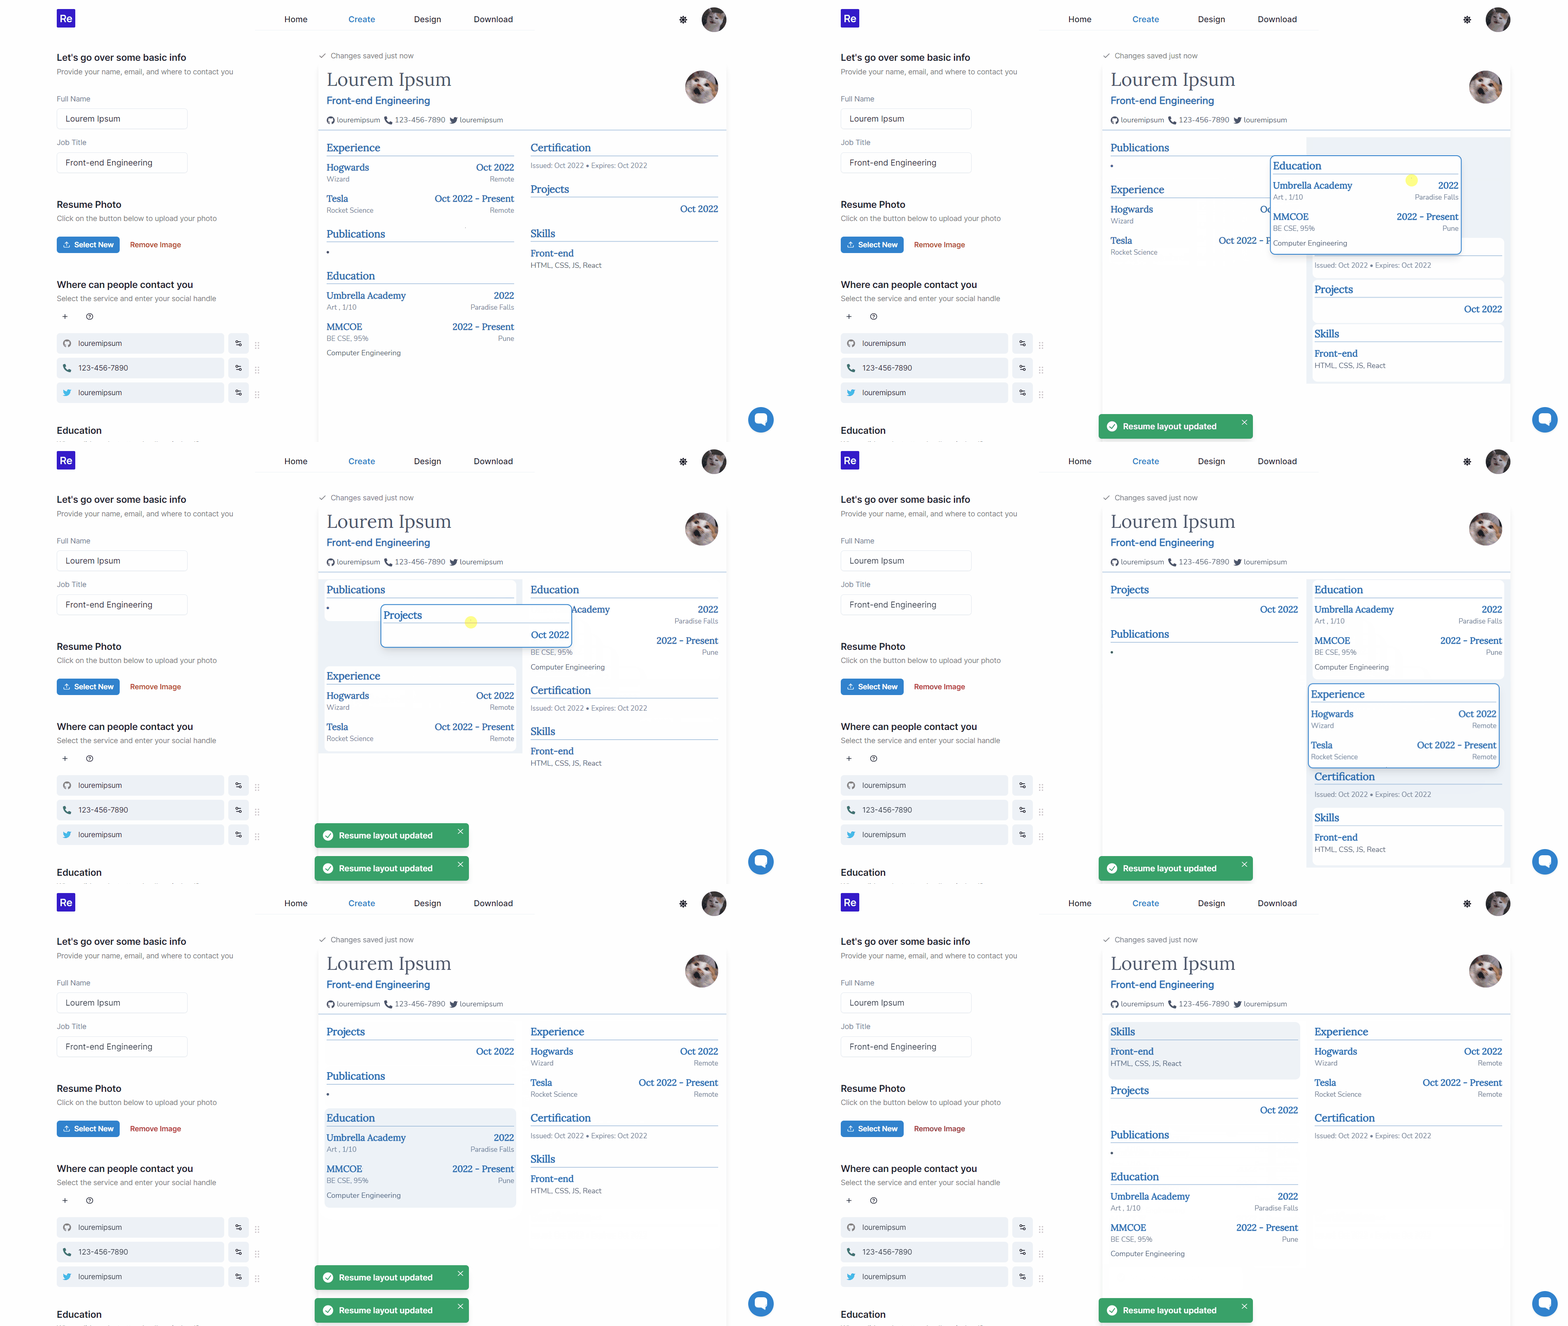
This section allows you to see a live preview of your resume based on the details filled. It also gives you the option to drag and drop sections of the resume to make any changes to the layout.
